Growing a thriving mountain garden in the San Bernardino Mountains requires adapting to unique high-altitude conditions. From starting seeds indoors to choosing the right plants for your elevation, mountain gardening is all about timing and selection. It can also be a rewarding way to engage with nature while creating a beautiful outdoor space. Mountain gardening techniques can truly enhance your gardening experience.
In this guide, we break down practical tips for gardening at different elevation zones across the San Bernardino range. We’ll begin with indoor seed starting, then cover Zone 1 (3,500–4,500 ft, e.g. Crestline, Twin Peaks), Zone 2 (4,500–6,000 ft, e.g. Lake Arrowhead, Running Springs), and Zone 3 (6,000–7,500+ ft, e.g. Big Bear, Green Valley Lake).
Mountain gardening offers unique challenges and opportunities that can lead to a fruitful and enjoyable experience.
Understanding mountain gardening methods is essential for success.
For each elevation zone, mountain gardening recommendations will vary, ensuring the best results.
Starting seeds indoors is a beneficial aspect of mountain gardening.
Incorporating mountain gardening techniques can elevate your gardening experience in these unique climates. Understanding the specific needs of mountain gardening will ensure a successful and fruitful garden.
When planning your mountain gardening, consider the local climate and specific plant needs.
By embracing mountain gardening techniques, you can optimize your planting schedule.
You’ll find recommended vegetables, herbs, flowers, and native shrubs for each zone, along with advice on mountain gardening techniques, soil, watering, and tackling challenges like late frosts, deer, and steep slopes. Adopting proper mountain gardening methods can help you thrive in this environment.
Start Indoors: Jump-Start Your Garden Before the Last Frost
For successful mountain gardening, soil health is crucial to support plant growth.
Investing in raised beds is a popular mountain gardening strategy for improved drainage.
When it comes to mountain gardening, choosing the right location for your garden can significantly influence your success. Explore options that maximize sunlight and shelter your plants from harsh winds.
Understanding local climate specifics is essential for mountain gardening success.
Mountain gardeners often face a short growing season and cold spring nights. Therefore, it’s wise to begin planting indoors. Start seeds for vegetables and annual flowers in late winter or early spring, using sunny windows or grow lights. This way, they’ll become sturdy seedlings by the time outdoor conditions are favorable. At higher elevations, frosts can hit as late as Memorial Day. As a result, you might not transplant warm-season veggies outdoors until around late May or early June.
This means you should expose them to outdoor conditions a bit more each day for a week or two. By the time your local “last snow storm” has passed, you’ll have robust young plants ready to go in the ground.
With mountain gardening, you can explore a variety of plants suited to higher elevations.
Adopting mountain gardening practices helps you thrive in challenging environments.
Starting seeds for mountain gardening indoors gives your plants a jump start.
Utilizing mountain gardening principles helps you adapt to various climatic conditions.
Also start herbs (basil, parsley) and flowers that need a head start. Keep seedlings warm and well-lit, and harden them off gradually before planting outside.
Understanding the growing season for mountain gardening in Zone 2 is essential.
Mountain gardening techniques will vary depending on your location and elevation.
For optimal mountain gardening results, regularly amend your soil with organic matter. Mountain gardening often requires extra attention to soil health to support plant growth.
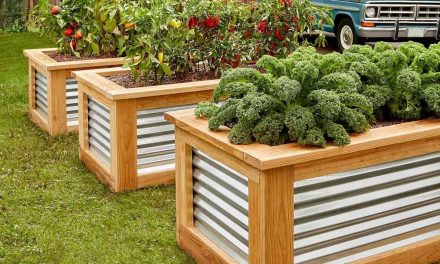
Many experienced mountain gardeners recommend using raised beds, as these can improve drainage and soil warmth, making them ideal for mountain gardening.
Gardens in this zone enjoy a bit of a head start on higher elevations, but still need to handle mild frosts and dry summers.
Using organic matter in your mountain gardening practices is vital for soil health.
Understanding local climate and elevation is crucial for successful mountain gardening. Tailor your planting and care strategies to fit the unique challenges of your location.
Incorporating the right techniques into your mountain gardening will yield great results.
About 6–8 weeks before your last frost date, sow seeds of vegetables like tomatoes, peppers, squash, and cucumbers indoors. Starting herbs and flowers that need a head start in mountain gardening is also recommended.
When starting seeds, choose fast-maturing and cold-tolerant varieties whenever possible. Many seed companies offer special high-altitude or short-season cultivars – for example, certain tomato varieties can produce ripe fruit in under 60 dayshighaltitudegardening.blogspot.com. Look for keywords like “early,” “cold-hardy,” or “short season” in seed catalogs. Some specialty seed suppliers even test their stock in harsh climates (one company tests seeds on the Canadian border to ensure they’ll perform in cold regionshighaltitudegardening.blogspot.com). By selecting the right strains, you improve your odds of success.
Keep seedlings warm and well-lit, and harden them off gradually before planting outside.
By raising seedlings indoors, you give plants a head start and avoid the “heartache” of surprise late frosts damaging tender sprouts.
Utilizing mountain gardening principles can help you adapt to varying climate conditions effectively, ensuring your plants flourish.
Utilizing the specific climate of Zone 2 can enhance your mountain gardening efforts.
Zone 1 – 3,500–4,500 ft (Crestline, Twin Peaks, Valley of Enchantment)
Climate & Growing Season: Zone 1 comprises the lower mountain communities like Crestline and Valley of Enchantment. Winters are cool with occasional light snow, but spring arrives earlier here than higher up, making mountain gardening easier in this zone.
For optimal success, select plants that are well-suited for mountain gardening.
The last frost is typically in early to mid-April, granting a relatively long growing season (possibly May through October). Summer days can be warm (even hot), while nights remain cooler than the lowlands – great for many plants.
Recommended Plants (Zone 1):
- Vegetables: You can grow a wide array of veggies here. Warm-season crops like tomatoes, zucchini, beans, corn, and peppers do well in the longer summer, especially in sunny spots. Plant after the last frost (mid-spring) and consider fast-maturing tomato varieties to ensure harvest before autumn chillhighaltitudegardening.blogspot.com. Cool-season vegetables (leafy greens, peas, broccoli) can be planted in early spring or late summer for fall harvest.
- Herbs: Many culinary herbs thrive in Zone 1. Perennials such as rosemary, thyme, oregano, chives, and mint can overwinter here (rosemary may need protection in an especially cold snap, but generally survives Zone 8-ish winters). Annual herbs like basil and cilantro will flourish in summer. Deer tend to avoid strongly scented herbs like lavender and sage, making them great choices for this zone’s gardens.
- Flowers: Take advantage of the moderate climate to grow both mountain wildflowers and classic garden blooms. California poppies, penstemon, lupine, and yarrow are native wildflowers that will thrive and enhance your mountain aesthetichparboretum.com. You can also enjoy easy annuals like marigolds, zinnias, cosmos, and sunflowers in the summer – they appreciate the warm days. In spring, bulbs such as daffodils and iris do well (and are deer-resistant naturally). Many gardeners in Crestline have had success with roses and lilacs as well, thanks to the mild winters (just be prepared to protect new growth from the occasional late frost).
- Native Shrubs: To blend landscaping with the natural surroundings, choose native or climate-adapted shrubs. Manzanita (Arctostaphylos) is a signature mountain shrub that does well here – its twisting red-barked branches and evergreen leaves add year-round interest. California lilac (Ceanothus) is another excellent choice for Zone 1; certain varieties of this wild lilac are both beautiful and surprisingly deer-tolerantsierrafoothillgarden.com, erupting in blue blooms each spring. Toyon (Heteromeles arbutifolia), also called Christmas berry, is a native shrub/small tree that grows in the lower San Bernardino range – it’s evergreen, produces red berries for wildlife, and is considered fire-resistant when well-watered. Other possibilities include Coffeeberry (Frangula californica) and western redbud (Cercis occidentalis) – redbud adds stunning pink blossoms in spring and is fairly drought-tolerant once established. These shrubs not only look natural in the landscape but also support local birds and pollinators.
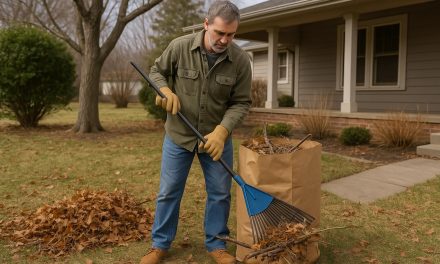
Zone 1 Landscaping Tips: Embrace the mountain lodge aesthetic by using boulders, natural wood, and native plants in your design. This zone’s plants can handle more sun and slightly higher temperatures, so you might incorporate dryland native perennials or even some succulents (like native dudleyas or agaves) in rock gardens. However, always keep fire-wise practices in mind: maintain clear defensible space near structures and avoid planting resinous, highly flammable shrubs too close to your home. Fortunately, many native plants here are relatively fire-resistant when kept healthy – for instance, yarrow groundcover stays low and maintains moisture, making it a safer choice than invasive grasses. As a bonus, native plants usually require less upkeep; they “grow slowly and maintain high levels of moisture in their leaves with little irrigation,” creating a beautiful but lower-maintenance gardendefensiblespace.org. Regularly clear fallen pine needles and oak leaves (see our mountain yard cleanup guide) to reduce fire fuel and give your garden plants room to breathe.
Zone 2 gardening is perfect for experimenting with a range of mountain plants.
Zone 2 – 4,500–6,000 ft (Lake Arrowhead, Running Springs, Arrowbear)
Choosing the right plants is key in mountain gardening for successful growth.
Climate & Growing Season: Zone 2 includes mid-elevation towns like Lake Arrowhead and Running Springs. Here, winters are colder and snowier than Zone 1, and the last frost typically hits in late April or early May. You’ll get a shorter summer growing window (approximately late May/early June through mid-October), and the temperatures are a bit cooler overall – warm days in summer, but nights can be quite crisp even in July. This climate is excellent for many cool-season vegetables and native plants that appreciate a bit of chill. Soil can vary: around Lake Arrowhead, expect sandy loam mixed with decomposed granite and a layer of pine needle duff, which can make soil slightly acidic. Adding organic compost will improve water retention and neutralize pH if needed. Watering is crucial as precipitation is mostly winter snow; by summer the ground dries out. Plan to irrigate vegetables and new plantings deeply 1–2 times per week. Drip irrigation works well on mountain slopes to direct water to roots without waste.
Recommended Plants (Zone 2):
In Zone 2, you can grow most of the same vegetables as Zone 1, with some extra planning. Warm-season veggies (tomatoes, squash, beans, peppers) are doable, but choose early-maturing varieties.
- Vegetables: In Zone 2, you can grow most of the same vegetables as Zone 1, with some extra planning. Warm-season veggies (tomatoes, squash, beans, peppers) are doable, but choose early-maturing varieties and be prepared to start them indoors or buy starter plants, since you’ll likely transplant in late May. For example, many Arrowhead-area gardeners transplant tomatoes around Memorial Day and still harvest by late summer, especially if using quick varietieshighaltitudegardening.blogspot.com. Cool-season crops really thrive here thanks to cooler nights – lettuce, spinach, peas, carrots, beets, and brassicas (kale, broccoli, cabbage) do very well and can be planted earlier in spring and again in late summer. You might get two shorter growing seasons in one year (spring and fall) for greens and roots. Also consider potatoes – they are a mountain favorite and do excellently in the Arrowbear and Running Springs climate (plant seed potatoes as soon as ground is workable in spring; they tolerate frost when mulched, and harvest in late summeremingersnursery.com). If you have space, hardy fruit trees like apples, plums, or cherries are suitable for this zone, as winters provide the chill they need – just protect young fruit blossoms from late frosts.
- Herbs: Many herbs appreciate Zone 2’s balance of warm days and cool nights. Perennial herbs such as sage, thyme, oregano, mint, and chives will survive the snowy winters here (they may die back and regrow in spring). Annual herbs like basil, dill, and cilantro can be grown in summer but will blacken at the first fall frost, so use them while you can. Consider planting herbs in pots that can be moved indoors or into a greenhouse to extend their season. Also, medicinal and aromatic natives can double as herbs and ornamentals – for instance, white sage (Salvia apiana) or Cleveland sage (Salvia clevelandii) can grow in this elevation (in well-drained soil) and their fragrant leaves can be used in smudges or teas. These sages are also fairly deer-resistant due to their strong smell.
- Flowers: Zone 2 gardens can be very colorful. You have the benefit of enough winter chill for bulbs and many perennials, plus a summer that’s mild enough for delicate blooms. Great choices include columbine (Aquilegia) and lupines, which flourish in mid-elevation meadows and gardens. Penstemon species (such as Penstemon spectabilis or mountain penstemons) are hummingbird magnets and thrive in these hills. For long-blooming garden color, try echinacea (coneflower), black-eyed Susan (Rudbeckia), and daisy varieties – they can handle the mountain sun and a bit of drought once established. Arrowhead’s famous dogwoods bloom in spring – if you have a shady, moist spot, a Western dogwood or azalea could be stunning (though these require more water and care). Don’t forget wildflowers: scatter seeds of California poppy, baby blue eyes, and buckwheat in fall or early spring, and you’ll get a lovely, naturalized display as seen at Heaps Peak Arboretumhparboretum.com.
- Native Shrubs: Mid-mountain elevations support a mix of chaparral and forest plants. For landscaping, you’ll want shrubs that can handle snow as well as summer heat. Manzanitas continue to be excellent here – look for higher-elevation species or cultivars (such as Arctostaphylos patula, the greenleaf manzanita common in local forests). Mountain mahogany (Cercocarpus) is a hardy native shrub/tree found around 5,000–6,000 ft; it’s great for erosion control on slopes and has attractive silky seed heads. Currants and gooseberries (Ribes) are highly recommended – the native golden currant (Ribes aureum) and wax currant (Ribes cereum) thrive in these mountains, offering spring flowers for hummingbirds and summer berries for wildlife. They also have good fall color. Another beautiful native shrub for Zone 2 is wild lilac (Ceanothus) – varieties like Ceanothus integerrimus (deerbrush) or horticultural hybrids can handle winter cold. Ceanothus not only gives brilliant blue flowers but is also fairly deer-resistantsierrafoothillgarden.com and fire-wise (it maintains a high moisture content in leaves). For evergreen structure, consider juniper or Arizona cypress in open areas – but be cautious, as some junipers are oily (higher fire risk) and may need placement away from structures. Always space shrubs with fire safety in mind, pruning dead branches regularly (see our pruning tips for mountain shrubs).
Utilizing proper mountain gardening techniques will enhance your landscape.
Zone 2 Gardening Tips: Because Zone 2 straddles a transition between lower and higher climate, microclimates matter. Take note of sun exposure and slope in your yard: south-facing slopes will thaw earlier and be drier (great for natives like sagebrush or buckwheat), while north-facing areas stay snow-covered longer (better for plants that like extra moisture). You can extend your season a bit by using row covers or cold frames to shield plants during surprise frosts – for example, cover your newly planted tomatoes on chilly spring nights with buckets or frost cloth. Likewise, in autumn, a simple cover might protect late zucchini or peppers from a light frost, squeezing a few more weeks of harvest. Mulching your garden beds is very beneficial here: a layer of pine needles or straw around plants will moderate soil temperature, retain moisture, and reduce weeds. (Keep mulch a few inches away from woody plant stems to prevent rot and discourage rodents.) And speaking of critters – by now you know the local deer and maybe even rabbits will sample unprotected gardens. Employ deer-resistant plants as natural barriers and consider fencing key areas or using repellents. Simple deer fencing around a veggie garden can save you a lot of heartache, since neighbors in these towns often quip that “deer will eat anything you plant if you’re not careful.” Don’t be discouraged; by choosing the right plants and protections, you can indeed have a beautiful garden with deer strolling through without them decimating everythingsierrafoothillgarden.com.
Zone 1 in mountain gardening presents an excellent opportunity to grow a variety of plants.
Local nurseries in this elevation, such as the garden center at Rim Forest Lumber (Rimforest), are great resources for finding appropriate plants and seed packets. They carry stock suited to the mountain climate and can offer advice specific to Rim of the World communities. Many Zone 2 gardeners also visit nurseries “down the hill” in spring (for example, in San Bernardino or Redlands) to buy vegetable starts, but be sure to harden off and acclimate those plants to your cooler climate. A tomato seedling raised at sea level will need a week or two of adjustment in Lake Arrowhead’s environment (morning sun, afternoon shade at first) to avoid shock. When in doubt, ask local experts – the folks at Rim Forest Lumber or the Heaps Peak Arboretum volunteers can guide you on what grows best herealpenswisstools.com.
Many mountain gardeners have successfully cultivated a diverse range of plants by understanding the principles of mountain gardening.
Zone 3 – 6,000–7,500+ ft (Big Bear, Green Valley Lake, Baldwin Lake)
Climate & Growing Season: The high elevation Zone 3 is a true alpine environment in Southern California terms. Communities like Big Bear Lake, Fawnskin, Green Valley Lake, and Baldwin Lake experience long, snowy winters and short, mild summers. Snow can linger into April, and frosts are common into late May or even early Junehighaltitudegardening.blogspot.com. The average last frost in Big Bear is around the end of Mayplantmaps.com, which often means you can only safely plant most vegetables outdoors in June. First frosts in fall can arrive by early Octoberplantmaps.com. This leaves roughly a 3-4 month growing season, so every week counts. Summer temperatures are pleasant (70s to low 80s °F daytime, 40s at night), with very strong sunlight and usually low humidity. Occasional afternoon thunderstorms or monsoonal rain in late summer might give brief relief, but you cannot rely on rain—consistent irrigation is needed for gardens. Soil in Zone 3 tends to be poor and sandy (decomposed granite) with low organic matter. For example, Big Bear Valley soils are famously fast-draining and low in nutrients. Amending soil generously with compost and aged manure is essential for success with vegetables and flower beds up here. Many high-elevation gardeners use raised beds and add imported topsoil to create a fertile base for plants (raised beds also warm up faster in springhighaltitudegardening.blogspot.com). Watering should be deep and less frequent to encourage roots to go down – typically 1–2 inches of water per week spread over a couple of watering sessions is good for veggie gardens, adjusting as needed if you notice wilting or dry soil. Drip irrigation or soaker hoses are highly recommended on the mountain; they deliver water efficiently and minimize evaporation in the intense sun. Mulch around plants to keep the soil cool and moist, but remember to maintain defensible space (don’t use highly flammable mulch near structures).
Recommended Plants (Zone 3):
- Vegetables: While the growing window is short, it’s possible to grow many veggies in Big Bear and other high communities – just with careful timing and the right varieties. Cool-season vegetables are all-stars here: peas, spinach, lettuce, radishes, kale, and carrots relish the cool nights and can be sown as soon as the soil thaws in spring. You can even plant a second round in late summer for a fall crop, as they tolerate light frosts. For warm-season vegetables, choose those with the shortest days-to-maturity and be ready to protect them from cold. Locals successfully grow tomatoes, tomatillos, summer squash (zucchini), pumpkins, beans, and peppers in Zone 3, but usually these are started indoors in April and transplanted outside in Juneemingersnursery.com. Opt for tomato varieties that ripen in <70 days (many gardeners have had success with varieties like Early Girl, Siberian, or Cherry tomatoes in Big Bear). Root crops like potatoes and beets do very well – seed potatoes can be planted in May with some frost protection and harvested by late summer. Big Bear nursery experts note that potatoes, onions, garlic, and chives are particularly well-suited to the climateemingersnursery.com (you can plant garlic cloves in fall for a summer harvest). Brassicas (cabbage, broccoli, cauliflower) can be grown too, but they may need row covers to protect from occasional summer hail or from pests like cabbage worms. One trick high-elevation gardeners use is season extenders: employ Wall O’ Water® plant protectors, cold frames, or hoop houses over your warm-season veggies in the early part of the summer. These devices act like mini-greenhouses, absorbing heat during the day and insulating plants at night. For instance, surrounding a tomato plant with a water-filled teepee early on can help it survive nights in May and speed up growthhighaltitudegardening.blogspot.com. Given the short season, expect later harvests – your tomatoes might not ripen until late August or September, and that’s okay. If an early freeze threatens, you can always pick green tomatoes and ripen them indoors. Lastly, don’t forget high-altitude legumes: beans and peas can be prolific here (peas especially love the climate, and beans can be direct-sown in June). With attentive care, you’ll be surprised how much food a summer in Zone 3 can yield.
- Herbs: Hardy perennial herbs are your best bet at the highest elevations. Chives, oregano, thyme, sage, and mint can survive winter under snow and come back in spring – in fact, snow acts as an insulating blanket for them. Lavender (select an English lavender, which is more cold-hardy) can also grow in Big Bear with sharp drainage. It will appreciate a south-facing spot and summer water, but can endure sub-freezing winters (some varieties are hardy to USDA Zone 5, which covers Big Bear’s coldest tempsemingersnursery.com). Annual herbs like basil or cilantro are more challenging – they need warmth and will die at first frost. You can still grow them, but treat them as indoor/outdoor container plants: start them inside, move them out during the warmest part of summer, and be ready to pull them back indoors or into a greenhouse when nights get cold. Parsley (technically a biennial) is worth planting; it’s fairly cold-tolerant and may even overwinter occasionally. Additionally, consider wild herbs that thrive naturally in the area – for example, Monardella (mountain coyote mint) is a native mint family plant that grows around 6,000+ ft. It has a wonderful fragrance and purple flowers that attract butterflies. It’s perennial and used to the climate, so a great low-care option for herb and pollinator gardens. Another tip: plant plenty of garlic and onion sets in spring. Not only do these produce well here, but their pungent smell can help deter deer and rabbits from the garden perimeter (deer are known to dislike allium family plantssierrafoothillgarden.com).
- Flowers: Gardening for beauty in Zone 3 can be extremely rewarding – many native wildflowers and alpine ornamentals flourish in these conditions, creating a stunning summer display. For perennials, look to classics that tolerate cold. Columbine (Aquilegia), especially the native Western columbine with red-and-yellow blooms, is right at home in high elevations and will reseed itself year after year. Lupines are iconic in Big Bear meadows – plant seeds of perennial lupine or the annual Arroyo lupine for spikes of purple and blue flowers. Gaillardia (blanket flower) and echinacea are hardy perennials that provide bright color and attract pollinators. Shasta daisy and Black-eyed Susans also do well and bloom in mid-summer. If you have a moist area or irrigated meadow-like space, try wildflowers such as paintbrush, Penstemon heterodoxus (a mat-forming penstemon with purple flowers), and California poppies (yes, they can grow at 6000 ft, especially in disturbed soil or along sunny slopes). Early in spring, you can enjoy bulbs like tulips and daffodils; these bulbs actually prefer the cold winter to set blooms. In fact, the famous Daffodil Garden in Running Springs (just below 6,000 ft) showcases how spectacular bulbs can be in mountain areas – thousands of daffodils naturalized on a hillside. Just be aware that deer will avoid daffodils (which are toxic) but will readily munch on tulips, so plant tulips only in protected areas or containers. For annual flowers, pick the quick and cold-tolerant ones: pansies and violas can survive light frost and give color in early summer and again in fall. Marigolds and calendula are also resilient and bloom well here; calendula in particular likes cooler weather and can self-sow. If you crave some exotic color, you could plant dahlias or gladiolus bulbs after frost, but be prepared to lift their tubers in fall or treat them as annuals, since they won’t survive frozen ground. One more high-elevation favorite: hollyhocks. These tall, old-fashioned flowers tolerate poor soil and cold winters (they’re biennial, often blooming in their second year), and they add a cottage-garden charm against fences or walls.
- Native Shrubs: In Zone 3, it’s wise to favor very hardy native shrubs that can handle snow load, subzero temperatures, and strong sun. A top recommendation is mountain sagebrush (Artemisia tridentata) – this silvery, fragrant shrub dots the Baldwin Lake area naturally. It’s extremely drought-tolerant and deer usually leave it alone due to its bitter oils. Sagebrush can be used in landscaping for a soft, gray-green foliage backdrop (just remember it is flammable when dry, so don’t plant it right up against your house). Another excellent shrub is rabbitbrush (Ericameria nauseosa), which turns golden with flowers in late summer and thrives in the sandy soils around Big Bear. It stays relatively low (2-3 feet) and provides late-season nectar for butterflies. Currants (Ribes) again are champions – the alpine currant and wax currant are very hardy. Plant a red flowering currant for gorgeous pink spring flowers; it will survive Zone 3 winters easily and brighten your yard as snow melts. Serviceberry (Amelanchier alnifolia) is a mountain-native shrub/small tree that can handle high elevation – it offers white blossoms, edible berries, good fall color, and a form that fits naturalistic landscapes. It’s also firewise if kept pruned, since it tends to stay leafy and moist. For evergreen structure, consider limber pine or bristlecone pine if you have space – these native conifers are slow-growing but add authentic alpine character (they are large trees eventually, so not exactly shrubs, but can be part of an overall landscape plan). A smaller evergreen shrub option is dwarf ceanothus (e.g., Ceanothus velutinus, snowbrush ceanothus, which grows naturally around 6,000–7,000 ft). It’s hardy and has white flowers; plus like other ceanothus, it fixes nitrogen in the soil which can help nearby plants. Manzanita also grows at these elevations – the Parry manzanita and greenleaf manzanita are found in local forests. You can plant cultivated varieties or try to establish natives from one-gallon pots; just ensure good drainage. Once established, these shrubs need little watering and give that classic mountain look. Lastly, wild roses (Rosa woodsii) are worth mentioning – they can form a thicket, but they are hardy to very cold temps, have beautiful pink flowers and rose hips, and are fairly fire-resistant (deciduous, with moist stems when green). They do attract wildlife (birds love the hips, deer might nibble new shoots), but are a nice native choice for an informal hedge in Zone 3.
Zone 3 Gardening Tips: The key in high elevations is maximizing the short season and protecting against extremes. Always wait until after the last hard frost to put out tender plants – often around Memorial Day or early June in Big Bearhighaltitudegardening.blogspot.com. If you’re itching to plant earlier, use protective structures: even a simple DIY PVC-and-plastic hoop house over a raised bed can warm the soil and air significantly, allowing planting a few weeks early. Be ready to deploy old bedsheets or frost blankets on any freak cold nights, even in mid-summer. On the flip side, while extreme heat isn’t common, the UV radiation at high altitude is intense – some delicate plants can get scorched. Providing a bit of afternoon shade (through shade cloth or planting near a lightly shading tree) can help vegetables like lettuce not bolt too fast. Wind can also be fierce on mountaintops; if your garden is in a windy spot, windbreaks (such as lattice fences or shrub hedges) will protect plants from desiccation. To deal with the soil challenges, container gardening is an option: many Big Bear gardeners grow tomatoes and peppers in large pots or half-barrels filled with rich potting mix. They can then move those containers to the sunniest, most sheltered corners of the patio and even bring them into a garage during an early fall frost. Container soil warms faster too. For in-ground beds, as mentioned, raised beds with good soil make a huge difference in productivityhighaltitudegardening.blogspot.com. Another tip is to fertilize regularly, since native mountain soil won’t supply enough nutrients for heavy-feeding veggies – use organic fertilizers or compost tea throughout the season to keep growth strong (but avoid over-fertilizing late, which could make plants tender going into fall). Pests in Zone 3 include the usual suspects: deer, rabbits, ground squirrels, and gophers. Deer are generally prevalent all over the mountain; they might be slightly less frequent in some high-traffic Big Bear neighborhoods, but in more remote spots they’ll come. Given the short season, you don’t want to lose your hard-won veggies overnight – so fencing or deer netting around vegetable gardens is highly recommended. Even a simple 6-7 ft net fence can do wonders to exclude deer. For gophers, line the bottoms of raised beds with wire mesh (gopher wire) to prevent them tunneling up into your root zone. Also consider some deer-resistant or repellent plantings around the perimeter: plants like Achillea (yarrow) or allium flowers not only look nice but may turn deer away due to their aromasierrafoothillgarden.com. And if bears are in your area, be mindful with compost and trash – a bear won’t typically bother your plants, but a rich compost pile or barbeque smell can attract them and they might trample the garden in the process. Keep compost enclosed and use bear-proof trash cans (a good practice for all mountain zones, actually). Overall, Zone 3 gardening can be challenging but extremely rewarding – the crystal-clear skies, lack of many lowland pests, and dramatic scenery make tending a garden here a truly special experience.
Big Bear gardeners are fortunate to have a great local resource in Eminger’s Mountain Nursery (on Big Bear Blvd). Eminger’s has a huge selection of plants proven to grow at 6,700 ft – from vegetables and fruit trees to native shrubs – and a knowledgeable staff to answer questionsemingersnursery.comemingersnursery.com. They even stock short-season vegetable starters and higher-altitude flower varieties during the spring planting rush. Shopping local at places like Eminger’s or attending the Big Bear farmers’ market (which often has vendors selling high-altitude seedlings) is the best way to get plants that are already adapted to Zone 3 conditions. When it comes to seeds, consider sourcing from companies or exchanges that specialize in cold climates. As one mountain gardening expert put it, “Buy seed grown in your region or you are courting disaster.”highaltitudegardening.blogspot.com Seeds from low-elevation growers might not perform as well in our microclimate. Fortunately, Eminger’s and other mountain nurseries carry seed lines suitable for our area, and you can also find suppliers online catering to Rocky Mountain or high desert gardening. By using locally appropriate seeds and starts, you set yourself up for a healthier, hardier garden.
Mountain gardening can yield delicious fruits and vegetables for your enjoyment.
Fire-Wise, Low-Maintenance Mountain Landscaping
One of the joys of mountain living is the natural beauty surrounding our homes. A well-designed mountain landscape will blend with the environment, require minimal upkeep, and be mindful of wildfire risks. The San Bernardino Mountains have a mix of forest and chaparral ecosystems, which can inspire our gardening choices. Here are some tips to achieve a landscape that fits the mountain aesthetic and stays low-maintenance and fire-wise:
- Favor Native Plants: Native trees, shrubs, and flowers are already adapted to the local climate and soils, meaning they typically need less water and care once established. They also support local wildlife (birds, butterflies, beneficial insects) far more than exotic plants. Perhaps most importantly for mountain residents, native plants can be a savvy fire-wise choice. Many California natives have high moisture content and maintain greener foliage with little irrigation, which helps them resist burningdefensiblespace.org. They also often grow more slowly and don’t build up excessive thatch or deadwood as quickly as invasive species dodefensiblespace.org. By incorporating natives like oak, mountain mahogany, currant, and buckwheat in your landscape, you create a garden that “retains moisture, even in dry areas” and is more likely to survive a wildfiredefensiblespace.org. (Of course, no plant is completely fireproof, but some are much less flammable than others.) The Heaps Peak Arboretum demonstration garden showcases how beautiful a native plant landscape can be, with displays of penstemon, poppies, lilacs, and more that thrive in our local mountainshparboretum.com.
- Design with Defensible Space in Mind: Fire-wise landscaping isn’t only about plant choice, but also how you place and maintain those plants. Aim to create zones around your house with decreasing vegetation density as you get closer to the structure. Within about 5 feet of buildings, it’s best to have non-combustible materials (gravel, stone, pavers) or very low groundcovers. From 5–30 feet out, use plants that are irrigated, low-growing, and high in moisture (lush lawns or wildflower meadows, herb gardens, well-spaced shrubs). For example, a border of wild strawberry or creeping thyme as a groundcover near the house can be attractive and acts as a green fire break – the beach strawberry forms a dense 4-inch mat and is even approved by fire authorities for landscapingdefensiblespace.org. Keep taller shrubs and trees pruned and remove any dead branches or leaf litter regularly (our yard cleanup guide covers seasonal clearing to maintain defensible space). Also, break up continuous planting beds with hardscape or empty space; this can slow down fires and also gives a tidy, intentional look to the landscape.
- Avoid Highly Flammable Plants: Steer clear of ornamentals known to be fire hazards. These include plants with oily, resinous foliage or peeling bark that readily ignites. Examples to avoid or use sparingly are eucalyptus, juniper, Italian cypress, certain pines or cedars right up against the house, and pampas grass. Instead, opt for species listed as fire-resistant in our region. Some fire-resistant native shrubs to consider: Coffeeberry, toyon, lemonade berry, yarrow, coyote mint, and Ceanothus (wild lilac) – these are noted by fire-safety guides for maintaining higher leaf moisture and not producing a lot of dry litterdefensiblespace.orgdefensiblespace.org. Deciduous trees like maples or aspen can be safer choices than pines for shade near the home, since they typically have lusher, higher-moisture leaves in summer and you can rake up the dropped leaves in the fall.
- Drought-Tolerant = Low Maintenance: Much of being “low-maintenance” in mountain landscaping is about choosing plants that don’t need constant watering or pampering. Summers can be dry and water rates high, so a drought-tolerant design will save labor and money. Natives again shine here – many California natives handle drought by going semi-dormant or slowing growth in late summer, which means less pruning and less watering needed from youdefensiblespace.org. Incorporate drip irrigation so that when you do water, it’s efficient and targeted (and you’re not hauling hoses up and down slopes every other day). Group plants by their water needs – for instance, keep thirstier plants like fruit trees or vegetable beds in one area near a water source, while farther out areas can be filled with chaparral plants that only need occasional deep watering. Mulch around ornamentals to reduce weeds and lock in soil moisture (just remember to refresh mulch annually and keep it cleared from right next to the house).
- Maintain the Mountain Look: Aesthetically, try to work with the natural terrain rather than against it. Incorporate existing rocks and boulders into your design – they add visual interest, retain soil on slopes, and of course don’t burn. Use natural-looking materials for any structures or edging (e.g., rusted metal, stone, wood in limited use) to complement the rustic setting. Plant arrangement can mimic nature – for example, cluster a few manzanitas and currants together with open space around them rather than planting a solid hedge. This mimics how they’d grow in the wild and also conforms to fire-spacing guidelines. For color, rely on the seasons: plant spring-blooming natives like wild lilac, currant, and redbud for a burst in April/May, then summer wildflowers like penstemons and buckwheats for mid-season color, and fall foliage plants (aspens, maples, oak bushes) for autumn interest. This seasonal approach reduces the need for constant replanting or annual displays – something is always taking its turn to shine.
- Fire-Wise Landscaping Resources: If you want to dig deeper, check out CAL FIRE’s guidelines on [fire-smart landscaping】(https://www.readyforwildfire.org/) and lists of fire-resistant plants from sources like the local Fire Safe Councilreadyforwildfire.org. Many native plant nurseries (like Theodore Payne Foundation or Rancho Santa Ana Botanic Garden) provide lists of plants that are both native and fire-wise. Implementing their recommendations can make your yard not just beautiful but a buffer in wildfire scenarios. Landscaping with an eye to fire safety, water conservation, and native beauty ensures your property is in harmony with the mountain environment and safer from natural threats.
In summary, a Zone-appropriate, fire-conscious landscape will use native, drought-tolerant species, strategic planting design, and regular maintenance (pruning, cleanup) to keep your mountain home both gorgeous and safe. Once it’s set up, such a garden will largely take care of itself – you’ll spend more time enjoying the pines and sunsets than mowing lawns or fussing over finicky plants.
Dealing with Late Frosts and Short Seasons
Late frosts are a fact of life in the San Bernardino Mountains. Gardeners at all elevations have learned to expect a cold snap well after the rest of Southern California has warmed up.
It’s not unusual to get frost on Memorial Day weekend in the higher elevations or a surprise October freeze that ends the growing season abruptly.
Also, start herbs (like basil and parsley) and flowers that need a head start. Keep seedlings warm and well-lit, and harden them off gradually before planting outside.
- Know Your Frost Dates: First, educate yourself on the average last frost date for your specific locale and elevation. For example, as mentioned earlier, Big Bear’s average last frost is late Mayplantmaps.com, Lake Arrowhead’s is around late April, and Crestline’s might be early April. Use these as guidelines, not guarantees. Likewise, know roughly when the first fall frost tends to hit. This gives you the length of your frost-free growing period. Any planning – when to start seeds, when to transplant, what varieties to plant – will revolve around that window.
- Time Your Planting Differently: Unlike lower-elevation gardeners who might plant tomatoes in March or April, “we mountain gardeners need to plant around June 1st and expect a later harvest.”highaltitudegardening.blogspot.com In practice, that means delay planting tender annuals and vegetables until the danger of frost has truly passed. If you jump the gun in early May with your tomatoes or squash, you’re almost guaranteed to see them blackened by frost. Patience is key. It might feel late, but planting warm-season crops in late May or early June is the safe bet above 5,000 fthighaltitudegardening.blogspot.com. By then, nights are warming and your plants will take off without setbacks. This adjusted timing also implies a later harvest – don’t worry if your tomatoes don’t ripen by August like they might in the valleys; up here, tomatoes often peak in September when days are still warm but nights start cooling. Embrace the delay as part of mountain living.
- Use Season Extenders: To cheat the frost a little, make use of season-extending tools. Cold frames, hoop houses, and cloches can all create a microclimate that’s a few degrees warmer than open air. Something as simple as covering a raised bed with a clear plastic tarp (with some ventilation) can turn it into a mini-greenhouse that warms the soil weeks earlier, allowing you to sow carrots or lettuce in March instead of April. Row covers (lightweight fabric covers) can shield seedlings from light frosts and wind while still letting sun and rain through. Many mountain gardeners keep old blankets or burlap sacks handy to throw over prized plants during an expected cold night. Wall O’ Water protectors (the teepee of water-filled tubes) are popular for protecting individual plants like tomatoes – they absorb heat in the day and release it at night, often safeguarding plants down to ~20°F. Using these, people have successfully set out tomatoes in early May and kept them alive through hard frostshighaltitudegardening.blogspot.com. Just remember to remove or vent covers during the day if the sun is strong, to avoid overheating.
- Choose the Right Varieties: As emphasized before, variety selection is crucial. Opt for short-season or cold-hardy varieties of each plant. For instance, instead of a 120-day watermelon, grow Sugar Baby watermelon, which matures in ~75 days. Instead of long-season dent corn, try Painted Mountain corn or sweet corn bred for high altitudes. Grow bush beans (which tend to produce quicker) rather than pole beans. If you love pumpkins, choose smaller varieties that ripen faster (small sugar pie pumpkins rather than giant 100-lb Atlantic Giants). Many seed companies label varieties as suitable for northern climates or give a days-to-harvest number – use those as your guide. Gardeners in truly cold zones (Zone 4 or 5) have developed and shared lots of heirloom varieties that work in places with cool summers; those can work for us too. Don’t be afraid to experiment: perhaps try that Russian bred tomato or that lettuce developed in the Rockies. As one high-altitude gardener put it, the challenge is half the fun!highaltitudegardening.blogspot.com – finding what thrives in your microclimate can be very rewarding.
- Leverage Microclimates: Even within your yard, there will be warmer and colder spots. South-facing walls, areas protected by rocks (which hold heat), or spots under pine trees (which can prevent frost from settling) may allow you to grow things slightly outside the norm or plant a week or two earlier. Conversely, low-lying spots where cold air settles (frost pockets) will be colder – avoid planting frost-sensitive plants in those. By observing your garden, you might notice that one corner always melts snow first – that could be a great place for a small veggie patch or fruit tree that needs a longer season.
- Accept the Limits: Even with all the tricks, some heat-loving plants just won’t get enough time or warmth to produce well. For example, melons and eggplants are notoriously difficult at high elevations because they love warm nights. You can grow them with extraordinary care, but yields might disappoint. Same for long-season peppers like bell peppers – you might get some, but perhaps not a bumper crop. It can be more satisfying to put your effort into crops that want to grow here. Many mountain gardeners shift focus from traditional summer veggies to things like potatoes, salad greens, root veggies, and peas which perform reliably and store well (so you can enjoy them into winter). You can always trade or buy tomatoes from a friend down in San Bernardino, but that friend can’t grow a crisp head of lettuce in July like you can up here! So play to the strengths of a cool climate.
- Plan for Quick Turnarounds: With a short season, every week counts. Plan your garden layout such that you can pull out early crops and immediately plant something else. For instance, after harvesting spring spinach or lettuce in June, use that space to transplant a fast-growing summer crop like bush beans or a summer squash. When peas finish in mid-summer, replace them with a quick fall crop of spinach or radish. By sequentially planting, you maximize the output of a short season garden. Also consider interplanting: plant something like radishes (ready in 30 days) in between slower plants like corn or broccoli. The radishes will be harvested before the slow guys need the space. This kind of intensive gardening is how you get more food in less time and area, which is ideal when the calendar is not on your side.
- Extend the Harvest in Fall: Just as we use tricks in spring, do so in fall. When frosts threaten in September/October, cover your plants at night. Often an early frost will be followed by weeks of perfectly nice weather – so if you can save your plants from that one cold night, you might get an extra month of production. Pick green tomatoes and let them ripen indoors on newspaper before a hard freeze hits. Move potted herbs inside. Embrace cool-season veggies again: some, like kale, carrots, and parsnips, actually become sweeter after frost, so they are great to leave in as long as possible. With a little protection, you might harvest carrots or green onions even into November. Meanwhile, consider building or buying a small greenhouse if you’re really serious about year-round growing – even an unheated greenhouse can significantly extend the growing calendar at high altitudes (and give you a winter project space).
In summary, late frosts and a compressed growing season do make mountain gardening more challenging, but by adjusting your timing, using season extenders, and choosing your plants wisely, you can still enjoy a bountiful garden. Think of yourself as both a gardener and a bit of a weather strategist. And when in doubt, don’t hesitate to wait – planting too early in these mountains is a recipe for disappointment, whereas planting “late” (by lowland standards) with well-conditioned seedlings can yield terrific results once the weather cooperates.
Keeping Deer and Critters Out of Your Garden
Deer are a common sight in the San Bernardino Mountains – and as charming as it is to see wildlife, it’s less charming to find your newly planted garden devoured by a midnight snack. In all three zones, deer and other critters (rabbits, ground squirrels, chipmunks) pose challenges for gardeners. Deer, especially, can be quite destructive, as they can hop fences and will sample a wide variety of plants. Here’s how to garden with deer in mind:
- Deer-Resistant Plants: While a truly “deer-proof” plant is mythical (a very hungry deer will nibble almost anything to survivesierrafoothillgarden.com), there are many plants that deer usually avoid. Incorporating these into your landscape can reduce browsing damage. Deer tend to dislike strong aromatic foliage, plants with thick or fuzzy leaves, and those with toxic or bitter substances. Some proven deer-resistant choices include:
- Herbs: Lavender, sage, thyme, oregano, rosemary – these aromatic herbs are often bypassed by deer (and you get herbs for your kitchen!). Alliums (onion, garlic, chives) are also rarely eaten; planting ornamental allium flowers or interplanting garlic among other plants can provide a protective effectsierrafoothillgarden.com.
- Flowers: Deer usually ignore daffodils (toxic), foxglove (toxic), yarrow (bitter/aromatic)sierrafoothillgarden.com, lantana (aromatic), marigolds (smelly), and zinnias. They also tend not to like asters, coneflowers, and black-eyed Susans, possibly because of their rough texture and strong taste. Columbine and penstemon are somewhat deer-resistant natives – deer might nibble flowers occasionally, but generally these aren’t their first choice. California fuchsia (Epilobium canum) is another great deer-resistant native flower; it has fuzzy gray leaves and bright red blooms that attract hummingbirds but not deer.
- Shrubs: Many California native shrubs have built-in deer defenses. Ceanothus (wild lilac) is one – despite one species being nicknamed “deerbrush,” established ceanothus is usually left alone once its leaves get toughsierrafoothillgarden.com. Manzanita with its leathery leaves also is fairly safe from deer. Coffeeberry and toyon have bitter chemicals in their leaves that deter browsing. Sages (Salvia species) like Cleveland sage or black sage are strongly scented and not palatable to deer (plus they are drought-tolerant and beautiful). Barberry (Mahonia/Berberis), including our native Oregon grape, has spiny leaves that make it deer-proof and a good barrier plant. Juniper and cypress shrubs tend to be ignored by deer as well (though note, those can be flammable). If you want something flowery, consider lilac bushes – surprisingly, lilacs are often not preferred by deer, perhaps due to their fragrance or taste (your mileage may vary). Viburnums and mountain mahogany are other possible deer-resistant shrubs. When planning your garden, try to mass these less-tasty plants around the perimeter as a natural fence.
- Groundcovers: Deer typically avoid certain groundcovers like society garlic (again an allium), lamb’s ear (Stachys) with its fuzzy leaves, and sage varieties like creeping thyme or woolly thyme. Even lawn alternatives like clover are not a deer favorite compared to, say, juicy grass or flowers, so a clover patch might endure better than a rose bed.
- Physical Barriers: The most surefire way to protect a vegetable garden or prized plants is exclusion. Fencing is the number one solution in serious gardening. A deer-proof fence needs to be around 7–8 feet tall, since deer are excellent jumpers. If a tall fence isn’t feasible for your whole yard, consider fencing just a garden area or orchard. Some people use stock panels or field fencing around garden beds. If aesthetics are a concern, there are nearly invisible mesh deer fence kits that can enclose an area without heavy posts – they use black polypropylene mesh that is hard to see from a distance. Another tactic: use a double fence or angled fence. Deer have poor depth perception, so two lower fences a few feet apart can deter them because they can’t judge the distance to clear both. Even an arrangement of stakes with fishing line strung around a perimeter at different heights can sometimes confuse deer (they bump into the line and it startles them). For smaller plants or temporary protection, netting or cages can work. Fruit bushes like strawberries or blueberries can be covered with bird netting that also keeps deer from nibbling. Individual young trees can be encircled with wire mesh until they grow out of the most vulnerable stage.
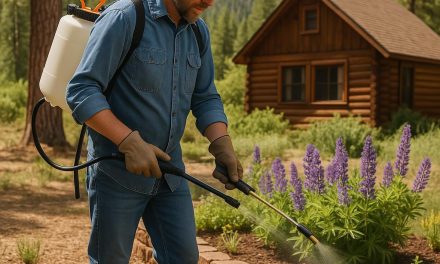
- Repellents: Various deer repellent sprays and granules exist, using smells/tastes deer dislike (garlic, rotten egg, predator urine, etc.). These can be useful to protect ornamentals or during times when deer pressure is high. You have to reapply them periodically (especially after rain or sprinklers). Many mountain gardeners swear by homemade remedies too – like hanging bars of heavily-scented soap (Irish Spring is popular) around the garden, or human hair, or fabric softener sheets. These home remedies create a smell that can confuse or deter deer for a while. Repellents are more of a supplement than a primary defense, as hungry deer might ignore even the nastiest taste if they’re desperate. But using them in combination with planting strategies and partial fencing can tip the balance.
- Garden Layout and Habitat: Deer prefer easy paths and a quick exit. If you design your landscape with some barriers and complexity, deer might be less inclined to venture in deep. Raised beds, terraces, and low fences (though not high enough to fully stop them) can psychologically deter deer or at least funnel their movement. For example, deer might walk around a raised bed instead of through it, sparing the plants on it. Try not to create a perfect buffet line leading from the forest into your garden. Also, if possible, do not feed deer (some people do this intentionally or not, with fruit drops, etc.), as it trains them to come into your space. Keep compost piles and bird feeders tidy as well – they can attract not just deer but rodents and bears.
- Deer Timing: Note that deer have seasonal feeding patterns. In spring, they love tender new growth – this is when your tulips or new vegetable transplants are most at risk. In summer, they may be more interested in lush irrigated plants (when the wild forage dries up). In fall, as natural food gets scarce, they might munch on almost anything to fatten up. And in winter, they browse on woody plants. Being aware of these cycles can help you time protections. For instance, use netting on fruit trees in early spring to protect new buds and again in late fall to prevent twig browsing. If you go on vacation in summer, definitely spray some repellent or have fencing up, because a vegetable garden left unattended is a deer magnet.
- Other Critters: Deer are the biggest browsers, but smaller animals cause trouble too. Rabbits can slip through fences and will gnaw seedlings to the ground. The deer tactics above (fencing, repellents) often work for rabbits too, but you might need smaller mesh (chicken wire around garden beds to keep bunnies out). Raised beds help because they’re a bit tall for rabbits to hop into easily. Ground squirrels and chipmunks love to dig up bulbs and steal seeds. For them, try using row cover or mesh over freshly seeded areas to prevent digging. Gophers, as mentioned, require underground wire barriers or trapping. Birds might peck at fruits or young leaves – netting can protect berries or even young sprouts (finches sometimes pull up seedlings). Bears usually aren’t interested in plants, but if you have fruit trees or berry bushes, a hungry bear might break branches to get at the fruit. Harvest fruit promptly and consider electric fencing if bears are a consistent issue with orchards or beehives.
- Pest Control Resources: Managing wildlife in the garden can be frustrating, but remember that all these animals are part of the mountain ecosystem. Non-lethal methods (fencing, repellents) are usually enough to find a balance. Our article on mountain pest control offers more in-depth strategies for deterring everything from insects to larger mammals, so give that a read for additional tips. It covers safe repellent recipes and how to handle persistent problems. By implementing a few of these measures, you can significantly reduce damage and coexist with the local fauna. Gardening alongside deer is possible – it just takes some proactive planning. When you see a doe and her fawn walking past your intact flower beds because you planted smartly and put up that little fence, you’ll feel both relief and a deeper appreciation for the wildlife around you.
Gardening on Steep Slopes and Terraces
Mountain gardens often come with a challenge that flatland gardeners rarely face: slope. Our homes are built into hillsides, and while that can mean great views, it also means your yard might be a series of inclines and uneven terrain. Gardening on a slope has its difficulties (erosion, water runoff, access), but with the right techniques, you can transform slopes into beautiful, productive spaces. Here’s how to make the most of your inclined garden:
- Terracing and Retaining Walls: One of the best ways to garden on a steep slope is to create terraces – essentially, level steps or platforms on the hillside. Terracing helps in many ways: it slows down water runoff (reducing soil erosion), allows water to soak in, and provides flat areas where plants can root deeply and you can stand to work. You can terrace formally or informally. A formal terrace might use retaining walls of wood, stone, or concrete to hold back soil and create a flat bed. Even a series of small stone or timber walls, say 1–2 feet high each, can step a steep hill into manageable tiers. Use materials that match your aesthetic – rustic logs or boulders blend naturally, while manufactured blocks or timber can give a tidy look. When building terraces, ensure the walls are strong and have some way for water to drain (weeping holes or drainage pipe) so pressure doesn’t build up. On a DIY level, you could even use logs staked in with rebar as mini-walls for vegetable garden terraces. The Alpen Swiss gardening guide notes that stone-walled terraces create areas “more conducive to plant growth” by improving drainage and sun exposurealpenswisstools.com. If walls are too much work, an informal approach is to dig a series of horizontal ditches or swales along the slope and pile the soil on the downhill side to make a planting berm – this is like a natural terrace without added materials, great for permaculture-style gardening.
- Erosion Control: Until your terraces and plants are established, slopes can shed soil in heavy rain. To combat erosion, consider using erosion control blankets (jute netting or coir mats) pinned to the slope after seeding or planting. These hold soil in place just long enough for plant roots to take over the job. Planting deep-rooted plants is key on slopes – their roots will stabilize the bank. Good choices include native grasses, which have extensive fibrous roots, and shrubs like manzanita or mountain mahogany that “anchor” the slope. Groundcovers are excellent too: something like creeping thyme, yarrow, or native strawberry will cover and knit the topsoil. As they fill in, their roots and stolons act like living netting. Another tip: add small check dams or contour logs on the slope – lay logs, branches, or rocks along the contour (horizontal) to catch sliding soil. Over time, soil builds up behind these mini barriers and plants can colonize, further securing the slope.
- Watering on a Slope: Water tends to run off slopes quickly, which can leave plants dry and also contribute to erosion. Drip irrigation is almost a must on slopes. It delivers water slowly right at the plant roots, allowing it to soak in rather than gush down the hill. Soaker hoses can also work if the slope isn’t too steep (you might spiral them around plants to keep them from sliding downhill). If you hand-water, use a nozzle setting that mimics rain or a gentle shower and water slowly, moving along the slope so each section can absorb it. Terracing as mentioned will help water sink in. Another method is to form small basins or terraces around individual plants: when planting a shrub or tree on a slope, create a flat “shelf” a foot or two around it and a little ridge on the downhill side – this basin will catch water for that plant. Mulching the slope is also critical for holding moisture – use something like shredded bark or pine needles (which you have an abundance of) as a mulch; it will also reduce erosion by softening the impact of rain.
- Plant Selection for Slopes: Slopes can have different conditions than level ground. Often the top of a slope is drier (water drains away) and the bottom is wetter (water accumulates). Also, steep south-facing slopes get a ton of sun and can be like a hot dry microclimate, whereas a north-facing slope might be quite shady and moist. Choose plants accordingly for different parts of your slope. In general, drought-tolerant and wind-tolerant plants do well on open slopes. Many native shrubs are ideal because that’s literally what they do in the wild – cling to hillsides. Think about chaparral plants: manzanitas, ceanothus, sages, chamise, etc., which evolved on slopes. You can create a “wild” slope garden that not only stabilizes the hill but looks like a natural part of the mountain. If it’s a smaller slope or you prefer a manicured look, terraces can be used like large planting boxes to grow anything from vegetables to rose bushes, as long as you improve the soil. Some people have beautiful terraced vegetable gardens on hillsides, often with stone walls absorbing sun and providing warmth (a trick vineyards use on steep terrain). Rock gardens are another great slope idea – tuck alpine plants or succulents between rocks; the rocks hold soil and the plants’ roots secure everything. Fruit trees and vines can also go on slopes – planting fruit trees on a north side can delay their bloom (sometimes good to avoid late frost damage), while on a south side it might accelerate growth. Grapevines, blackberries, and other brambles love hillsides and can be trained to grow along contours.
- Access and Maintenance: Don’t forget to plan paths or steps so you can easily tend your slope plantings. It’s no fun (and not safe) sliding down a dirt incline with a watering can. Install some steps – could be as simple as half-buried logs or stone slabs as stepping stones – or a switchback path that lets you walk the slope gradually. Railings or rope handrails can be considered for very steep or large terraces. Make sure you can reach all parts of your terraced beds without acrobatics. Once a slope is terraced and planted with mostly perennials, maintenance is actually easier than mowing a flat lawn – you’ll mostly be pruning and weeding, which you can do from your flat terrace areas. If you’ve chosen natives and drought-tolerant plants, there will be less frequent maintenance needed overall. Just keep an eye out for any erosion issues and address them quickly (for instance, after a heavy rain, check if any new gullies formed and fill them in or reinforce that spot with rocks/plants).
- Terraced Beauty: Terraces can be aesthetically pleasing as well – think of the famous terraced farms in mountainous countries or the hillside vineyards in Europe. Your mountain garden terraces can have an old-world charm or a woodland feel. You could make one terrace a vegetable patch, the next one a flower garden with cosmos and poppies, the next a native shrub screen. Variety in each level adds interest. You can also use each terrace as a mini microclimate: the lower terrace might stay cooler and shadier (good for shade plants or greens), while the upper terrace is hot and sunny (good for cacti or squash). Be creative; a slope is an opportunity to create a garden that’s anything but flat and boring.
- Sustainable Landscaping on Slopes: Beyond aesthetics, managing slopes is environmentally beneficial. By gardening your slopes rather than leaving them bare, you prevent sediment from washing into streams (helping water quality) and you create habitat. Consider planting a mix of deep-rooted natives and shallow-rooted groundcovers to utilize different soil layers. If you have a very steep, hard-to-plant area, even just seeding native wildflowers or spreading an erosion-control wildflower mix can establish cover and beauty. There are specialized seed mixes for slopes that include fast-germinating annuals and perennial grass seeds to quickly bind soil.
To sum up, slope gardening does take some upfront work to terrace or establish plants, but once done, it can turn a problem area into the highlight of your property. As one guide put it, “Build stone walls to create terraces in a stepped formation, allowing better drainage and optimal sun exposure”alpenswisstools.com – in other words, work with the slope. Soon you’ll have a tiered mountain garden that not only looks stunning but is also easy to maintain and resilient against erosion. Whether it’s a hillside of cascading flowers or a terrace of tomatoes, don’t let that incline intimidate you – conquer it step by step!
Must-Have Tools for Mountain Gardening
Tending a mountain garden can be a hands-on adventure, and having the right tools makes all the difference when working with rocky soil, steep grades, and forest debris. Below is a list of essential tools and equipment especially useful for mountain gardening and landscaping:
- Digging Tools for Tough Soil: Mountain soils can be hard and full of rocks, so invest in sturdy digging tools. A pointed shovel (spade) with a sharp tip helps penetrate the soil and pry out rocks better than a flat shovel. A garden fork (spading fork) is great for loosening and turning soil with less resistance when rocks or roots are present. Perhaps the MVP for mountain gardeners is the mattock or pickaxe – this tool has a pick on one side and an adze (hoe blade) on the other, allowing you to break up hard ground and cut through roots easily. It’s perfect for digging planting holes in compacted or rocky areas where a normal shovel just won’t cut it. There’s also a specialized version called a Pulaski (a tool firefighters use, with an axe and adze) which is excellent for both chopping and digging – very handy if you’re removing scrub or doing trail work on your property. Sturdy tools are key; cheap tools might bend or snap in our soil. Look for all-steel shovels or those with reinforced handles for durabilityalpenswisstools.com.
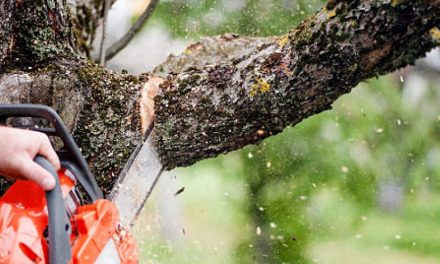
- Pruning and Cutting Tools: With so many trees and shrubs around, quality cutting tools are a must. Get a good pair of bypass pruners for snipping twigs and harvesting veggies. Loppers (long-handled pruners) allow you to cut thicker branches (up to 1.5-2 inches) and are useful for clearing brush or pruning fruit trees. A hand saw (pruning saw) is necessary for larger branches – folding saws are convenient to carry around. Keeping forest trees limbed up and shrubs thinned is part of fire-safe maintenance, so you’ll use these tools regularly. As the Alpine gardening guide suggests, high-quality pruning shears and loppers are worth italpenswisstools.com – they stay sharp and last years. Also consider a pole pruner or pole saw if you have tall trees to trim (or hire an arborist for the big stuff).
- Digging Bar/Crowbar: For prying out big rocks or old roots, a heavy steel digging bar (also called a breaker bar) is extremely useful. It’s basically a 5-6 foot long solid metal bar that you can jam under boulders to lever them out of the ground, or use the sharp end to break up caliche/hardpan. It’s a brute-force tool, but mountains often call for that when you encounter a buried rock the size of a watermelon right where you want to plant your new shrub.
- Rakes (Leaf and Garden): You’ll likely need two types of rakes. A leaf rake (fan rake) for gathering pine needles, leaves, and other light debris – fall yard cleanup in the mountains involves a lot of pine needles! And a bow rake (metal rake) for heavier work like spreading gravel, moving soil, or leveling areas. Clearing pine needles is not just cosmetic; it’s important for fire safety and plant health (thick layers can smother beds), so a durable leaf rake or even a pine needle rake (with adjustable tines or a wider span) is handy. Some gardeners also use a flat shovel or scoop shovel to pick up piles of needles once raked.
- Wheelbarrow or Garden Cart: Hauling materials up and down slopes is tough on the body. A good wheelbarrow (one or two-wheeled) or a garden cart can save your back. If your property has uneven paths, consider a two-wheel cart or even a contractor’s wheelbarrow with a single pneumatic tire that can bounce over rocks. These help move soil, rocks, firewood, plants, you name it. For very steep areas, some folks use a sled or tarp to drag heavy items downhill (for example, piling rocks on a tarp and skidding it down). But for general use, a wheelbarrow is essential. Pro tip: don’t overfill it on steep terrain – multiple lighter loads are safer than one top-heavy load that could tip.
- Watering Tools: We’ve talked about drip irrigation, which is more of an installation, but you’ll still need watering tools for hand irrigation and container plants. A garden hose (make sure you have enough length to reach all areas, perhaps with multiple hose segments around the house). Attach a spray nozzle or watering wand that can give a gentle shower for watering seedlings and baskets. If you’re in a cold zone, be sure to drain and store hoses come winter to prevent freeze damage. Also, consider a rain barrel or cistern if you want to catch roof runoff – in many mountain areas, capturing rain (or snow melt from your roof) is a great way to get extra water for the garden, and gravity can feed a drip system from a barrel placed uphill.
- Soil Tools: Have some basic tools for soil work: a hoe (great for weeding and making furrows – a shuffle hoe or hula hoe is particularly good at slicing weeds off at the roots without much effort). A cultivator (three-prong hand tool or a long-handled cultivator) helps to loosen soil in small areas or between plants. A wheel cultivator (also called a wheel hoe or cultivator) can be handy for larger vegetable patches on flat terraces – it’s like a human-powered tiller that weeds between rows. Given the small scale of most mountain gardens, a full-size tiller machine might not be necessary (and can be hard to maneuver on slopes).
- Hand Tools and Accessories: Don’t forget a good hand trowel for planting bulbs and small plants. A Hori-Hori knife (a Japanese garden knife) is a versatile tool – it acts as a trowel, knife, and saw, perfect for digging out weeds or planting quart-size perennials in tight spots. Gloves are a must – choose durable ones, maybe leather-palmed, because handling rough rocks and thorny bushes is all in a day’s work here. Knee pads or a gardening kneeling pad can save your knees when working on rocky ground. Also, sun protection gear – a wide-brim hat and perhaps UV-protective clothing – because the sun’s intensity is high in thin mountain air.
- Power Tools (if needed): Depending on your property, you might consider a few power tools. A string trimmer (weed whacker) is useful for cutting down weeds or grasses on slopes where a mower can’t go. It’s practically essential for keeping grasses short for fire safety in summer. A chainsaw or electric pole saw might be necessary if you have dead trees or large branches to clear (only if you’re trained/experienced, of course). For snow country, a snow shovel or snow blower is part of yard care too – not directly gardening, but you’ll need to clear paths to your greenhouse or woodpile in winter!
- Safety and Comfort: Given the terrain, think about personal gear too. Sturdy boots with good traction are important for working on slopes (no flip-flops while wielding a mattock on a hill!). If you’re moving a lot of heavy stuff, consider using a back brace or at least practice good lifting (lift with your legs, not your back). A first aid kit nearby is smart – scratches and scrapes happen. Also, be mindful of altitude effects; you might get dehydrated or sunburned faster, so keep water nearby and use sunscreen.
Investing in quality tools may cost a bit more upfront, but they will serve you for many years through the tough conditions of mountain gardeningalpenswisstools.com. A sharp pair of pruners or a solid shovel can be the difference between an enjoyable afternoon outside and a frustrating one. Keep your tools maintained – sharpen blades, oil moving parts, and store them out of the weather. Mountain air can be harsh (dry rot wooden handles, rust metal) so a little care goes a long way. With the right toolkit, you’ll be well-equipped to build your dream terrace, prune that overgrown pine, or simply tend your veggie patch with ease.
Finally, remember that innovation is your friend – many mountain gardeners jury-rig tools or come up with clever solutions for their unique needs. Don’t hesitate to modify or MacGyver something if it works for you (like attaching extensions to tools to reach a far slope, or using a sled to haul logs). Gardening at elevation can be tough work, but it’s also deeply satisfying, and each task is easier when you have the proper tools in hand.
Conclusion: Thriving on the Mountain
Gardening in the San Bernardino Mountains is a journey that follows the rhythm of the seasons and the contours of the land. By starting seeds early indoors, choosing plants suited to your elevation zone, and applying smart landscaping practices, you can create a mountain garden that is both productive and beautiful year-round. We’ve covered how to adapt to late frosts, short growing seasons, deer visits, and steep slopes – challenges that at first might seem daunting, but ultimately make the fruits of your labor even sweeter. With each passing season, you’ll gain more intuition about what works for your specific microclimate, turning potential obstacles into opportunities (for example, that rocky slope becomes a gorgeous rock garden, or that cold pocket becomes a spot for spring bulbs).
Remember to take advantage of local knowledge and resources. Visit the nurseries we mentioned – talk to the folks at Eminger’s in Big Bear or Rim Forest Lumber’s garden center – as they can offer tips born of long experience in these mountainsalpenswisstools.com. Join community groups or forums (many mountain gardeners connect on local Facebook groups or at farmers markets) to swap stories and even plants. And keep learning: the science and art of horticulture is always evolving, with new plant varieties and techniques emerging that could benefit mountain growers.
A well-tended mountain garden doesn’t just benefit you; it contributes to the health of the mountain community and ecosystem. Native landscaping supports wildlife and makes your property more wildfire-resilient. Growing some of your own fruits and veggies adds a measure of self-sufficiency (and deliciousness) to your mountain lifestyle. Even the act of gardening – getting outside, breathing pine-scented air, working with the soil – enriches your well-being. It’s often said that gardening is cheaper than therapy and you get tomatoes; up here, it might be a bit of an investment, but the returns are tenfold in joy and satisfaction.
Consider the elevation of your garden area carefully, as it impacts your mountain gardening approach. Higher elevations often require specific plant selections and care strategies.
If you’re planning a large-scale garden project or home landscape makeover and need some financial flexibility, help is available. Imelda Bridges, a local mountain home and garden expert, is a great resource for home improvement or garden financing. She has helped many residents finance their dream patios, greenhouses, and terraced gardens. Whether it’s a new drip irrigation system or a complete yard redesign, Imelda can offer guidance and financing options to fit your budget and turn your vision into reality.
In closing, “Living on a mountain” means working with Mother Nature – sometimes on her terms – but the results of mountain gardening are worth the extra effort. By following the elevation-tailored advice in this guide, you’ll be well on your way to a flourishing mountain garden, whether you’re down in Crestline with an early tomato harvest or up in Green Valley Lake enjoying summer wildflowers.
Related: For further reading and mountain gardening tips, check out our guides on seasonal yard cleanup, pruning trees and shrubs, and organic pest control solutions. Each of these aspects ties into successful mountain gardening – from clearing winter debris to shaping plants for health and managing pests ethically.
Your mountain gardening experience can be greatly improved by local knowledge.
By engaging in mountain gardening, you contribute to the health of your community.
Consider financial assistance options when planning your mountain gardening projects.